a) For telecentric lenses this is
the ratio of image size to object size
b) For entocentric lenses this is
the ratio of image size to object size at a given distance.
Example (telecentric lens)
If you want to map an obbject of 10mm diameter to s Sensor with 1/3″ (= 6mm diagonal!), you need a magnification of 6/10 = 0.6x
If you want to map an obbject of 10mm diameter to s Sensor with 1/3″ (= 6mm diagonal!), you need a magnification of 6/10 = 0.6x
The lower the magnification, the larger the visible object section. Say, if you can’t get a lens with the desired magnification, you can choose a lens with a slightly smaller magnification, eg 0.55x instead of 0.6x in the above example.
Example (entocentric lens)
With a 1/2 “Sensor (8mm diagonal), a distance of 500mm and an object cutout of 16mm diagonal, the magnification is 8/16 = 0.5.
Doubling the distance (to 1000mm) allows the lens to see about twice as much (32mm ). As a result, a magnification of 8/32 = 0:25 results.
In particular, the magnification at infinity is zero!
Since for entocentric lenses the FOV changes with the working distance, the magnification changes too!
Each entocentric lens achieves each magnification (if it can be used beyond the MOD)! .. We just have to choose the right distance between the object and the camera.
Each entocentric lens achieves each magnification (if it can be used beyond the MOD)! .. We just have to choose the right distance between the object and the camera.
So there’s the naive hope that just one entocentric lens could be enough for all applications then …
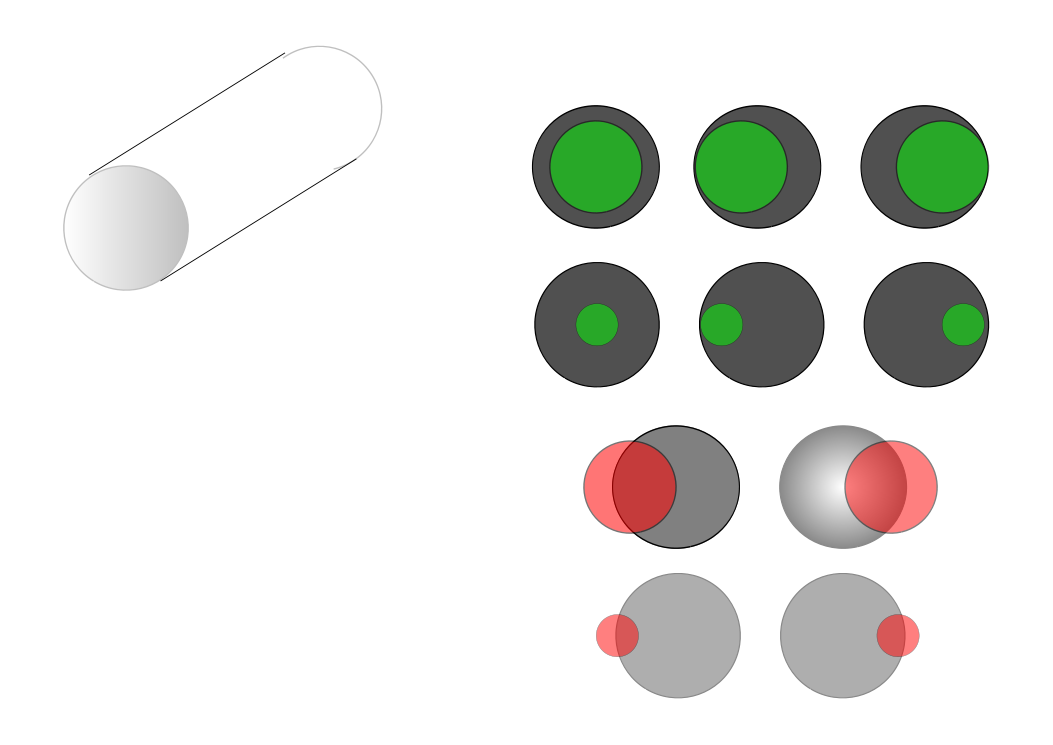
The Problem is however, that (for entocentric lenses) with the distance to the object, also the perspective changes. Telecentric lenses keep the perspective!
The Problem is however, that (for entocentric lenses) with the distance to the object, also the perspective changes. Telecentric lenses keep the perspective!

Typical high magnifications in image processing end at 10x.
Typical high magnifications in microscope imaging end at 100x, where magnifications above 40x usually need immersion, say, the lens is used in oil!.
When you read about higher magnifications like 200x and higher, there’s an excellent chance that the size of the monitor is also included!
Typical high magnifications in microscope imaging end at 100x, where magnifications above 40x usually need immersion, say, the lens is used in oil!.
When you read about higher magnifications like 200x and higher, there’s an excellent chance that the size of the monitor is also included!
see :
optical magnification
electronic magnification
monitor magnification